 Welding is considered to be an exceptional line of work because of how it contributes to numerous industries like construction, repairs and even in technology. Little do some people know; that welding can simply be a hobby that one can practice at home.
There are countless welding projects that you can do, whether you want to improve your skills, make some repairs at home, or just want to sell them for extra income. There are plenty of projects that can be completed, whether you’re just starting out or are an expert and want to make products for personal contacts. Below, we’ll mention some of the things you can make using your welding skills and some supplies.
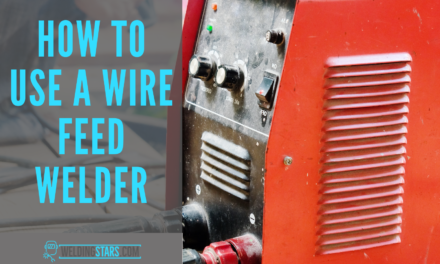
To get started you will only need a welder, welding helmet, and a little knowledge of basic welding symbols.
A Fire Pit
Fires are a great way to stay warm and socialize, which is why it’s always considered a good idea to hold bonfires as a way for newly enrolled students to make friends. You can craft a simple 4-panel fire pit in your welding space. For this project, you’ll need some:
- A tape measure
- Your Favorite Welder
- One Hammer
- Heat resistant paint to coat it off
- Steel chequer plate with dimensions of 1200 x 1200 millimeters and thickness of 2.1mm
- one straight edge tool
- Some Boilermaker’s chalk
- Angle grinder
- A drill
- Your usual safety equipment like helmet, gloves, and jacket
First, sketch out your idea on some graph paper before committing to a design. This way, you can check to see if you like it. After you’ve sketched out the basic plan, be prepared to cut it out using an angle grinder. You’ll need to make some folds in the steel as well, so make sure to score along those lines to at least half the thickness of the sheet. This will make it easier to fold later on.
You’ll need to make one fold upwards, and then one downwards so that there’s good support. Make sure to align the corners neatly so that it’s easy to weld them. Once you’ve held them in place, use your welder to put some tacks just so your folds don’t move. After you’ve placed the tacks, use your welder to make a clean weld along the inside and outside.
Next, you need to bend the inner folds and line them up using a straight edge. You can then weld some tacks to see if you’re happy with the shape before committing yourself to the shape. Drill some holes in the bottom so that it’s easier to drain and clean it out. Lastly, you can top it off with a coat of heat-resistant paint if you wish but it’ll cost a pretty penny.
In case you prefer more detail, check out the video above for a tutorial on how to make a custom fire pit.
A Coat Rack
One of the easiest welding projects that beginners can put together is a coat rack using horseshoes. It looks good and doesn’t take up much time either. Not to mention, it’ll be much sturdier than regular wooden ones that can be purchased at the store, so you can hang items like backpacks too. Here’s what you’ll need:
- 9 standard size horseshoes
- A welder; MIG or TIG will do
- An angle grinder with cutoff disk OR plasma cutter
- A vise grip clamp to hold the horseshoe in place while cutting
- Clear coat spray like Rust-oleum for a patina and resistance to rust
- Essential safety gear
Begin by taking three horseshoes and drawing a line in the middle because you need halves to use as hangers. Hold each horseshoe in place using your clamp and then cut on the line using your angle grinder. Make sure to put on your safety goggles and noise cancellation gear before cutting, because angle grinders make a lot of noise.
Once you’ve got the halves, set them aside until you’re ready to weld them on the base. For the base, you can use your remaining horseshoes and line them up in any pattern you’d like. Once you’ve done this, weld small tacks so that it’s held in place and you can check to see if the design looks good to you.
After you’ve decided to stick with the design, you can move on by welding the horseshoes together along the lines where they meet. After doing that from one side, flip your base around and then weld the horseshoes from the other side to make it look neater.
Next, it’s time to place your hangers, and just to make it easy, make sure that you place them in the middle of a horseshoe so that you can check whether they’re aligned properly. Weld a small tack first, and then weld it onto the base. You can follow this step by step tutorial below for a better idea of how you should go about it.
A Shop Stool
Using a few spare parts lying around your house, you can make a cool shop stool to rest on while working on a welding project. You won’t even need those many materials, to begin with; you can make do with a scrap steel band, rods, and old nuts to make this stool. Of course, you’ll also need your safety gear and a welder. See, no wood involved.
Building it is rather easy; first take your scrap metal band to make a circle shape that’ll hold the nuts. Use a firm round item that’s the right size you prefer for your stool, and wrap the steel band around it. Cut off any excess material and get the right size before welding it close.
Inside the circular hoop, arrange the spare nuts so that they fill the space and are connected to each other. After carefully arranging them on your fabrication table, you can weld a weld the nuts to each other and the outer ones to the steel band.
Measure your rods at the height you’d prefer and then connect them using a shorter piece of rod, for extra stability. Weld them together, and then repeat this process on another pair of stool legs. To make sure that your rods are properly aligned, you can set up a wooden jig temporarily, on your table. After you’ve got the stool legs, you can weld them onto the stool. For a quick summary on how to go about the project, you can check out this video.


