Terms in welding are communicated through drawings and symbols. By being able to understand the welding symbols, one can easily read a welding diagram. When you are working with a welder, you could be puzzled when trying to figure out what they intend to do as they offer you a verbal explanation of a puzzling diagram. Knowing how to read weld symbols will help you to discern what your designer and welder are communicating to each other.
The symbols are often a collection of elements that have been put together, so for the best effect, it is advisable to understand what each aspect of the element means.
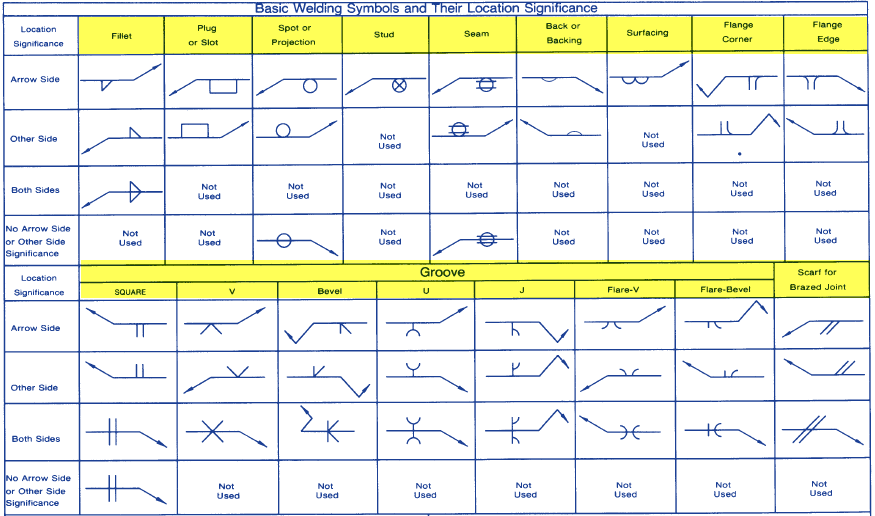
The most common symbols can be discerned as follows:
- The General Welding Symbol – This is made up of an arrow which points towards one location of the proposed weld on the chart or diagram. It connects with a horizontal line, which is called the reference line. This connection is done through a leader line. It finishes off with a tail, which is on the opposite side of the arrow head. This tail resembles a fish, as it forks off in two differing directions. Specific directions for what needs to be done are often written inside the fork usually represented by letters and numbers.
- The Weld Symbol – This is different from the general welding symbol. It is often represented as a circle, a round geometric shape. The location is at the center of the reference line. Its purpose is to indicate what type of weld should be performed. Sometimes the weld symbol is placed below the reference line. In this position, the meaning is that the weld needs to be done on the arrow side of the joint. If the weld symbol appears on the top of the reference line, it means that the weld should be done on the side opposite of where the arrow is pointing. On occasion, the weld symbol will appear on both sides of the reference line. This means that the weld can be done on both sides of the joint.
- There are other symbols that are found on welding diagrams, and these are represented by letters.
- S – The depth of Bevel, size or strength for particular welds.
- E – Groove weld size.
- R – Root opening: Depth of Filling for Plug or Slot Welds.
- A – Groove angle; included angle of countersink for plug welds.
- L – Length of weld.
- P – Pitch (Center to Center Spacing) of welds.
- N – Numbers of Spot, Seam, Stud, Plug, Slot or Projection Welds
- There are basic symbols for different types of welds, and they are known as beads, fillets, plug or slot, square, V, Bevel, U, J, Flare V, Flare Bevel.
The general welding symbols can appear with a variety of contours that detail how a fillet weld shape should be finished after welding. The contour shape may be flat, or it could be convex. The elements (represented by a letter) is placed above the slope on the fillet weld symbol.
If you need a handy quick guide check out this one. You can get this Welding Chart on Amazon and will save you hours of time when learning to Weld. (we still use this same chart with years of welding)

![]()
Another common weld symbol is the groove welds which when read illustrates how to make the edge to edge joints. Reading this symbol can help to discern T joints and those which have a flat or curved piece. When reading welding symbols, you need to be able to read the numbered dimensions as well. The reason for this is that these dimensions explain the length of the reference line. The weld width is normally indicated to the left of the weld symbol on the line, whereas the weld length is indicated on the right.
Should there be some dimensions that are indicated below the reference line, they are meant to be applied to the joint on the arrow side. The dimensions that appear above the reference line apply to the joint on the side opposite the arrow.
Weld symbols can also be used to specify angles or root face dimensions. This is particularly common for metal components that are more than a quarter-inch thick. Numbers written as fractions have will illustrate the root face, whereas numbers expressed as degrees signify the sum of the angles levelled on each side.
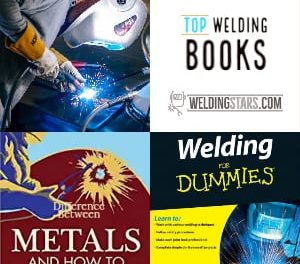
If your looking for more guides on how to read weld symbols, we've put together a list of our favorite welding books on getting started with welding. (The third book in the list is the one I used to learn to weld)
